How to Trade Order Blocks
To trade an order block, you identify the last opposing candle before a strong, structure-breaking move, wait for price to return to that zone, then enter in the direction of the original move with a stop just beyond the zone. A bullish order block is the last down candle before a sharp rally; a bearish order block is the last up candle before a sharp sell-off. Trading order blocks is a return-to-zone (mitigation) approach, not a breakout one, and the order block entry tends to read best when it aligns with your higher-timeframe bias and other confluence rather than being taken in isolation.
What an order block actually is
An order block is a specific candle, or narrow zone, that price often reacts to when it returns. In Smart Money Concepts (SMC) and ICT methodology it is defined precisely: the last opposing candle before a strong move that breaks market structure. The 'opposing' part matters — you are looking for the final candle that went against the direction of the impulse that followed.
Bullish vs bearish order blocks
- Bullish order block: the last down (bearish) candle before a strong rally that breaks structure to the upside. The zone is commonly drawn from that candle's low to its high. On a return, it can act as potential demand/support.
- Bearish order block: the last up (bullish) candle before a strong sell-off that breaks structure to the downside. The zone is commonly drawn from that candle's high to its low. On a return, it can act as potential supply/resistance.
The rationale traders attach to it is the accumulate–displace–reload story: large players are presumed to accumulate positions in the zone, displace price away in an explosive move, then price later returns to 'reload' before continuing. Again — that is a narrative for organising your reading of the chart, not a confirmed fact about who traded what.
How an order block trade works
A point beginners often miss is that an order block is a return-to-zone trade. You are not chasing the explosive move — you are waiting for price to come back. The sequence usually looks like this:
- Price forms the order block candle, then makes a strong move away from it (the displacement).
- Later, price retraces back into the order block zone (this return is called mitigation).
- You watch for the zone to hold and price to resume in the displacement's direction.
- You enter near the zone, place your stop beyond the zone, and target the next liquidity pool or structure level.
The terms to know
- Displacement — the strong, large-bodied impulse away from the order block. Without it, the candle is just a candle, not an order block.
- Break of Structure (BOS) — price breaks a prior swing high or low, confirming continuation. Most sources treat this as essential: no BOS, no valid order block.
- Change of Character (CHoCH) — the first break against the prior trend; used on lower timeframes to time confirmation entries.
- Mitigation — price returning to the zone. A partial mitigation taps the edge; a full mitigation fills the whole zone.
- Liquidity sweep (stop hunt) — price spikes past an obvious high or low to trigger stops, then reverses. A common, higher-quality sequence is sweep → CHoCH/BOS → order block entry.
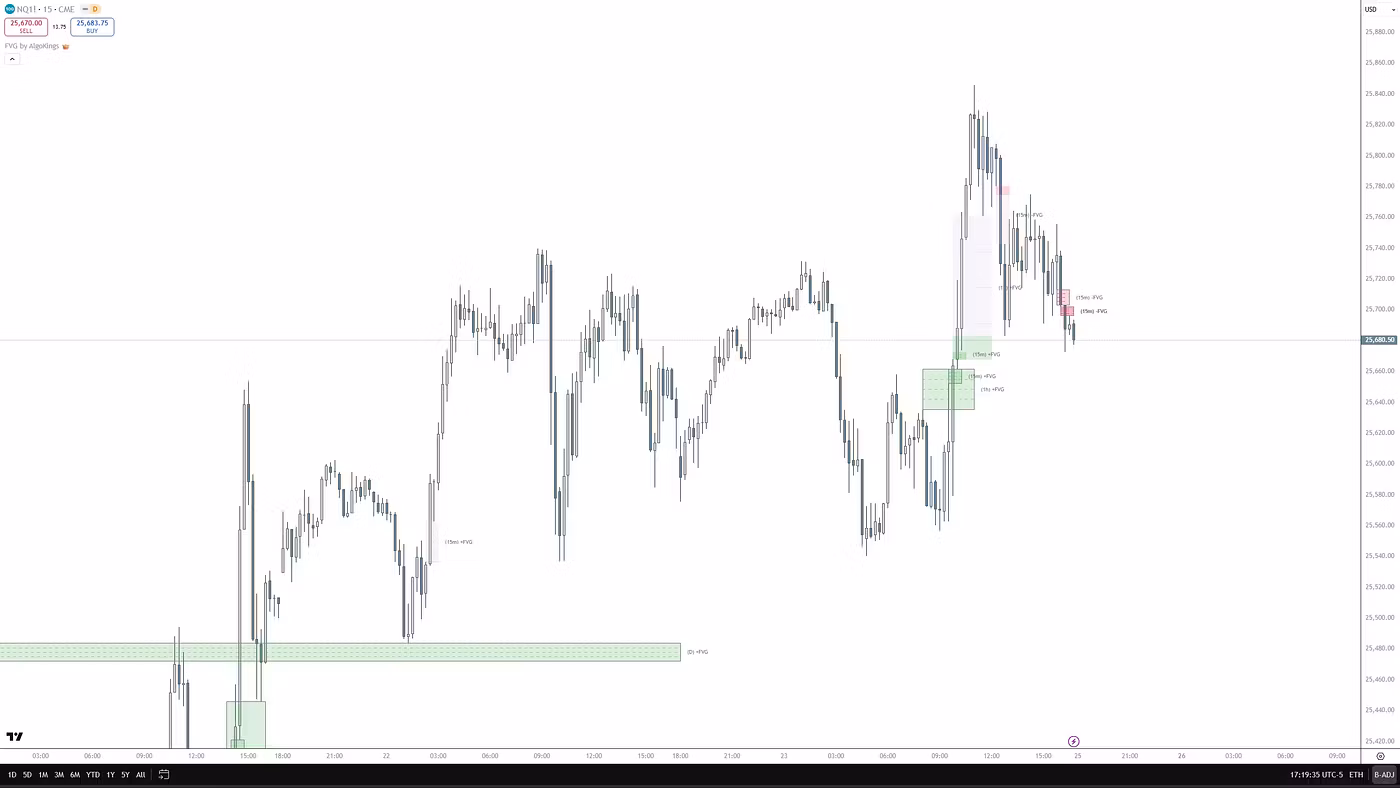
- Fair value gap (FVG) — a three-candle imbalance left by the displacement. An order block that overlaps an FVG is often treated as stronger confluence.
- Breaker block — a failed order block. When price breaks fully through, the zone flips polarity: a failed bullish order block can become resistance, a failed bearish one can become support.
How to confirm a valid order block (not a random candle)
Many candles that look like order blocks are just consolidation noise. A zone is more credible when it stacks up evidence. Before relying on one, check that it has a clear displacement away from it and a Break of Structure confirming the move, and ideally a liquidity sweep beforehand and/or an FVG inside the impulse. The more of these align, the stronger the case for the zone.
Direction matters just as much. Traders generally take bullish order blocks only when the higher-timeframe bias is bullish, and bearish order blocks only when it is bearish. A clean order block in the opposite direction is a counter-trend setup, which is typically lower-probability and carries more risk than trading with the prevailing trend.
Which timeframe to use
Higher-timeframe order blocks (4H, Daily, Weekly) are generally regarded as more reliable than 5m or 15m zones, which are noisier and tend to fail more often. A practical top-down workflow is to mark your bias and major zones on the Daily and 4H, then drop to 15m or 5m only to refine the entry. The first time price returns to an unmitigated (untouched) zone is widely considered the strongest opportunity; each subsequent retest is assumed to consume resting orders and weaken it.
Order block entry, stop-loss and take-profit
Three entry models
- Limit entry at the zone edge — a resting order with no confirmation. Cleanest risk-to-reward and often paired with higher timeframes, but typically a lower win rate because you commit before price proves anything.
- Confirmation entry — wait for a lower-timeframe CHoCH or a reversal candle (pin bar, engulfing) inside the zone before entering. Usually a higher win rate, with slightly worse risk-to-reward because you enter later.
- FVG-refinement entry — enter on a smaller fair value gap that forms inside the order block. The tightest and most selective model: fewer trades, but strong risk-to-reward when it triggers.
Stop-loss and take-profit
A common approach is to place the stop beyond the order block wick — below the low for a long, above the high for a short — plus a small buffer for noise. Putting the stop inside the candle body is a frequent mistake that can lead to premature stop-outs. For targets, traders often aim at the next logical liquidity pool or opposing structure: an unswept swing high for longs, an unswept swing low for shorts. Setups are typically framed around 1:2 to 1:4 risk-to-reward.
Common mistakes to avoid
- Trading every order block on the chart — most are just consolidation, which leads to overtrading.
- Ignoring the higher-timeframe trend and taking counter-trend setups, which is one of the more common ways traders give back gains.
- Labelling any last-opposite candle an order block with no displacement and no BOS.
- Drawing zones too wide, which erodes risk-to-reward and makes almost any touch look like a 'reaction'.
- Entering before the expected liquidity sweep and getting stopped on the spike that precedes the real move.
- Using the order block as the only signal, with no confluence — these tools are designed to be combined.
- Re-trading a zone that has already been mitigated as if it were fresh.
- Trusting a perfect-looking zone drawn in hindsight; live identification is far harder, so it helps to rely on signals confirmed on candle close.
Order block vs supply/demand vs breaker block
- Order block vs supply/demand zone: a supply/demand zone is the broad 'expensive/cheap' neighbourhood, often several candles wide. An order block is the specific last-opposing candle tied to a structure break — essentially a supply/demand zone refined with stricter rules.
- Order block vs breaker block: an order block is typically used as a continuation tool (the zone holds). A breaker block is a failed order block that price broke through and flipped polarity — used as a reversal tool.
- Order block vs mitigation block: closely related, and the terminology varies by educator. 'Mitigation block' is often used for a zone where trapped or losing positions get managed back toward breakeven, rather than fresh accumulation. Treat the labels loosely.
Do order blocks actually work?
They can offer an edge, but realistically only as part of a confluence-based, risk-managed process — and the marketing around them is often overstated. Self-published backtests put standalone order blocks around 50%, rising into the mid-60s when combined with BOS or CHoCH confluence, and higher still on clean higher-timeframe setups. Treat those figures as approximate and third-party, not guarantees; none come from independent academic studies. The '80–90% win rate' numbers in many ads are cherry-picked and best ignored.
A more useful mental model than win rate is the math of risk-to-reward. Break-even win rate is roughly risk ÷ (risk + reward), so at 1:3 you only need to win about 25% of the time just to break even — which is why chasing a high win rate is often the wrong target. Much of SMC and ICT is also repackaged classic price action: order blocks resemble refined supply/demand, and liquidity sweeps echo Wyckoff-era stop hunts. That does not make the framework useless — it makes it a structured way to read price, where results tend to depend far more on discipline and risk management than on spotting the 'perfect' candle.
If you want to apply this consistently without hand-drawing every zone, AlgoKings' SMC Package automatically marks structure, order blocks and fair value gaps across your charts, and the standalone FVG indicator helps you spot the imbalance-plus-order-block confluence described above. They are analytical tools to speed up and standardise your reading — not trade signals, and not a substitute for your own risk management.
Frequently asked questions
What exactly is an order block, and which candle is it?
An order block is the last opposing candle before a strong, structure-breaking move. For a bullish order block, it is the last down candle before a sharp rally that breaks structure up; for a bearish order block, the last up candle before a sharp sell-off that breaks structure down. The zone is commonly drawn across that candle's full range (low-to-high or high-to-low).
How do I confirm a valid order block instead of a random candle?
Look for a clear displacement (a strong impulse away from the zone) plus a Break of Structure — most traders treat BOS as essential. Stronger setups also show a liquidity sweep beforehand, a fair value gap inside the impulse, and alignment with your higher-timeframe bias. Without displacement and a structure break, it is just a candle.
Where do I enter, place my stop, and take profit?
There are three common entry models: a limit order at the zone edge (cleanest R:R, lower win rate), a confirmation entry after a lower-timeframe CHoCH or reversal candle inside the zone (higher win rate), or an FVG-refinement entry on a smaller gap inside the order block (tightest). Traders typically place the stop just beyond the zone's wick with a small buffer, and target the next unswept liquidity pool or opposing structure — commonly framed around 1:2 to 1:4 risk-to-reward.
What is the best timeframe for trading order blocks?
Higher timeframes (4H, Daily, Weekly) are generally regarded as more reliable than 5m or 15m, which are noisier and tend to fail more often. A common approach is top-down: set bias and mark major zones on the Daily and 4H, then refine entries on the 15m or 5m. The first, unmitigated return to a zone is widely considered the strongest.
Do order blocks expire?
There is no fixed expiry. An order block is generally considered valid while it remains unmitigated (untouched), and weaker after each retest. It can be invalidated when price closes decisively through it — at which point it may flip into a breaker block — or when a major news event changes the picture.
Are order blocks really institutional footprints?
There is no verifiable proof. Retail traders cannot see institutional order data, so an order block is an interpretive model, not a confirmed record of where institutions traded. Sharp moves can come from news, retail momentum or random flow. Order blocks can still be useful as a structured way to read price, but manage your expectations and your risk accordingly.
Risk disclosure
AlgoKings provides technical analysis indicators and educational material for informational purposes only. Nothing on this website is financial, investment or trading advice. Trading financial instruments carries a high level of risk and may not be suitable for every investor; you can lose some or all of your capital. Indicators do not predict future price movements and do not guarantee any outcome. You are solely responsible for your own trading decisions and risk management. Past performance is not indicative of future results.